Note
Access to this page requires authorization. You can try signing in or changing directories.
Access to this page requires authorization. You can try changing directories.
Note
Community interest groups have now moved from Yammer to Microsoft Viva Engage. To join a Viva Engage community and take part in the latest discussions, fill out the Request access to Finance and Operations Viva Engage Community form and choose the community you want to join.
[This article is prerelease documentation and is subject to change.]
The Supplier Communications Agent helps you identify and follow up on purchase orders that vendors didn't yet confirm or that delivery is late for. For each order that it finds, the agent automatically generates a draft email that is addressed to the relevant vendor.
The Supplier Communications Agent helps you perform the following actions:
- Create agent tasks to find purchase orders that require follow-up. Each user has unique tasks, so you can create and adjust them to meet your specific business needs. Two default tasks are provided. One is used to follow up on unconfirmed purchase orders, and the other is used to follow up on late deliveries. You can modify or delete the default tasks as required to meet your business needs.
- Configure how emails are generated for each task.
- Review the draft emails that the agent generates. After you review each message, you can modify it, and send it. To generate the emails, the agent uses data from the purchase order lines and related tables.
By default, the system provides two tasks that help you find purchase orders that require action:
Unconfirmed purchase orders – This task finds purchase orders assigned to you with a delivery date within the next 60 days that the vendor didn't yet confirm (that is, the confirmed delivery date is blank). The task uses the following criteria:
- The Deliver remainder (line) field is set to a value other than 0 (zero).
- The Confirmed receipt date (line) field is blank.
- The Requested receipt date (line) field is set to a date that is before the current date.
- The Orderer (header) field is set to your user account (the current user).
- The Document status (header) field isn't None.
Delayed purchase orders – This task finds purchase orders assigned to you that are delayed (that is, the confirmed delivery date is one or more days ago). The task uses the following criteria:
- The Deliver remainder (line) field is set to a value other than 0 (zero).
- The Confirmed receipt date field is set to a date that is before the current date.
- The Orderer (header) field is set to your user account (the current user).
Configure task criteria and email settings
The following procedure explains how to set up agent tasks to find purchase orders that require follow-up. It also explains how to configure the way that Copilot generates vendor email content for each task.
Open the (Preview) Follow-up emails page by following one of these steps:
- Go to Procurement and Sourcing > (Preview) Supplier Communications Agent > (Preview) Follow-up emails.
- Open the Purchase order receipt and follow-up workspace. A tile named (Preview) Follow-up emails indicates the number of emails that require review. Select the tile.
Follow one of these steps:
- To edit an existing task, select it in the list, and then select Edit.
- To delete an existing task, select it in the list, and then select Delete.
- To create a new task, select Configure agents. Then, under Library, select Send follow-up emails to vendors with Supplier Communications Agent.
Edit the name of the task as required. (The default name is Send follow-up emails to vendors with Supplier Communications Agent.)
Select whether you want the task to find unconfirmed purchase orders or delayed purchase orders.
Modify the criteria to define which purchase orders require follow-up. For example, you might want the task to find: unconfirmed orders for the next two months, or orders created more than three days ago, or orders sent but not confirmed.
Select the fields that you want to include in the email, such as delivery dates or the address.
To add a signature, select Signature, and enter the desired text. You can also add an email footer that has text such as "This email was written with the help of AI."
Important
If your system is set up to send emails automatically, the email footer is mandatory.
Select the tone of the emails (Casual or Formal, *Urgent, or Non-urgent).
Examples
Here are some examples of other tasks that you might set up:
To generate emails for orders that you created less than three days ago, and that the vendor didn't yet confirm, specify the following criteria:
- The Deliver remainder (line) field on the line is set to a value other than 0 (zero).
- The Confirmed receipt date (line) field on the line is blank.
- The Created date field is set to a date that's between three days before the current date and current date.
- The Orderer (header) field on the header is set to your user account (the current user).
To generate emails for orders that you created for vendor group A less than three days ago, and that the vendor didn't yet confirm, specify the following criteria:
- The Deliver remainder (line) field on the line is set to a value other than 0 (zero).
- The Confirmed receipt date (line) field on the line is blank.
- The Created date field is set to a date that's between three days before the current date and current date.
- The Orderer (header) field on the header is set to your user account (the current user).
- The Vendor (group) field is set to A.
Configure automatic sending of follow-up emails
To configure automatic sending of follow-up emails without requiring user review, follow these steps:
- Sign in to Supply Chain Management as an administrator.
- Go to System administration > Workspaces > Feature management.
- Make sure the (Preview) Send follow-up emails to vendors with Supplier Communications Agent - automatically sending emails feature is turned on. This feature is optional and is turned off by default. Learn more in Set up and configure the Supplier Communications Agent.
- Go to System administration > Setup > Email > Email parameters.
- Open the Configuration tab.
- On the General FastTab, set Batch email provider to Graph. This setting turns on the batch email provider.
- On the Enabled interactive email providers FastTab, make sure that Graph is listed in the Enabled column.
- On the Microsoft Graph settings tab, make sure that the Application ID and Application secret fields are filled in. If they aren't, you might need to contact your organization's Azure tenant admin for help. Learn more in Configure Microsoft Graph in Dynamics 365 finance and operations apps.
- To test whether the email is working, open the Test email tab. Set Email provider to Graph and enter the email address for an account that you can read in the Send to field. Then select Send test email and check your inbox for the test email.
Configure the email sender
When a user reviews and sends an email that the agent drafts, the email comes from that user's email address.
When the system automatically sends an email without user review, the email comes from the agent identity user email address.
To configure the email address of any user (including the agent identity user):
Sign in to Supply Chain Management as an administrator.
Go to System administration > Users.
Select the user you want to configure (for example, the agent identity user).
On the Action Pane, select User options.
Open the Account tab.
On the Email provider selection FastTab, make the following settings:
- Email provider ID – Set to Graph.
- Sender email – Enter the email address that should appear in the From field of the follow-up emails sent by the selected user.
On the Account FastTab, enter the Name that you want to show in the signature of the email body. The emails conclude with a "Best regards" signature that includes the name configured in this field.
Tip
If you're a user without administrator rights in Supply Chain Management, you can configure your own email parameters, but not other users'. To configure your own email parameters, select the settings gear icon at the upper right side of the screen, and choose User Options from the menu. Then continue from step 5 in the previous procedure.
Configure the email receiver for each vendor
To choose the recipient of the follow-up emails for a vendor, follow these steps:
- Go to Accounts payable > Vendors > All vendors.
- Find and open the target vendor from the list.
- The Contact information FastTab lists various ways that you can contact the selected vendor and lets you edit the list. Use the settings here to configure the email address the agent should use when sending follow-up emails to this vendor. The agent chooses which contact line to use as follows:
- If a contact line is set up as the priority email address for purchase order communications, the agent always uses that email address for this vendor, regardless of whether the agent task is set up to send emails per purchase order or grouped per vendor. For details about how to set up this address, see Set up the priority purchase order communications email address for a vendor.
- If no contact line is set up as the priority email address for purchase order communications, the agent applies the following logic to find the email address to use:
- If the agent task is configured to send emails grouped per vendor, the agent uses the contact line of Type Email address that has the Primary checkbox selected. If no email address is set as Primary, then the agent arbitrarily chooses one of the lines of Type Email address.
- If the agent task is configured to send emails per purchase order, the agent prioritizes the Email field of the purchase order if there is one. If the purchase order doesn't have an email address, the agent uses the vendor's contact information as described in the previous bullet point.
Tip
To see whether an email address listed on the Contact information FastTab is set up as the priority email address for purchase order communications, select the row and then select Edit contact information from the FastTab toolbar. In the Edit contact information dialog, check the value of the Purpose field. If it's set to Purchase Order Communications (or to another name that was created for this purpose), the email address is set up as the priority email address for purchase order communications. Learn more in Set up the priority purchase order communications email address for a vendor.
Set up the priority purchase order communications email address for a vendor
As described in the previous section, the agent always uses the contact line that is set up as the priority email address for purchase order communications if such a line exists for the vendor, regardless of whether the agent task is set up to group emails per vendor or per purchase order. To set up this priority address, follow these steps:
Go to Organization administration > Global address book > Address and contact information purpose.
At the top-right corner of the grid, open the Grid options menu (ellipsis button) and select Insert columns.
In the Insert columns dialog, select the check box for the row with a Field value of Type. Then select Update. The grid now shows a Type column.
If a row already exists with a Type of Purchase Order Communications, note its Purpose name and skip this step. Otherwise, add it by selecting New on the Action Pane and make the following settings for the new row:
- Purpose – Enter a short name, such as My Purchase Order Agent Communications.
- Description – Enter a short description, such as Priority purchase order communications email address for a vendor.
- Postal address – Don't select this check box because this purpose is for email addresses, not postal addresses.
- Contact information – Select this check box. This option makes the row available for use with contact information lines, including email addresses.
- Type – Select Purchase Order Communications.
On the Action Pane, select Save.
Go to Accounts payable > Vendors > All vendors.
Find and open the vendor you want to set up from the list.
On the Contact information FastTab, select the row with the email address you want to send follow-up messages to. Then select Edit contact information from the FastTab toolbar.
In the Edit contact information dialog, set Purpose to the purpose name you found or created earlier in this procedure.
Select OK.
Review and send drafted emails
To review the emails that were previously created for the various configurations, go to Procurement and Sourcing > (Preview) Supplier Communications Agent > (Preview) Follow-up emails. The configurations appear on the left, and the emails for each configuration appear on the right.
Edit each message as required, and then select Send to send it to the vendor.
Set up the periodic agent run schedule and batch job options
The Supplier Communications Agent includes a batch job that runs the agent automatically. To change the default configuration of the job, follow these steps:
Go to System Administration > Inquiries > Batch jobs.
Find and select the job that has a Job description that matches the name of the agent configuration, which is described in Configure task criteria and email settings. For example, if the agent name is Send follow-up emails to vendors with Supplier Communications Agent, you can locate its batch job quickly by using this text in the Job description column header filter. The agent name might be different on your system, so check the name before proceeding.

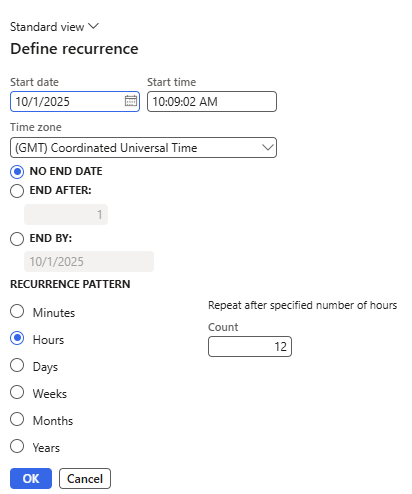
Select the job, and then select Recurrence from the Action Pane.
In the Define recurrence dialog, set up the run schedule as desired, and then select OK.
To get more information about the batch job and adjust other settings, return to the Batch jobs page and select the link in the Job ID column.

