Note
Access to this page requires authorization. You can try signing in or changing directories.
Access to this page requires authorization. You can try changing directories.
In this article, you learn how to use Apache Spark MLlib to create a machine learning application that handles predictive analysis on an Azure open dataset. Spark provides built-in machine learning libraries. This example uses classification through logistic regression.
This tutorial covers these steps:
- Set up notebook and imports
- Load and sample NYC taxi data
- Prepare and engineer features
- Encode categorical features
- Train logistic regression model
- Evaluate and visualize results
The core SparkML and MLlib Spark libraries provide many utilities that are useful for machine learning tasks. These utilities are suitable for:
- Classification
- Clustering
- Hypothesis testing and calculating sample statistics
- Regression
- Singular value decomposition (SVD) and principal component analysis (PCA)
- Topic modeling
Prerequisites
Get a Microsoft Fabric subscription. Or, sign up for a free Microsoft Fabric trial.
Sign in to Microsoft Fabric.
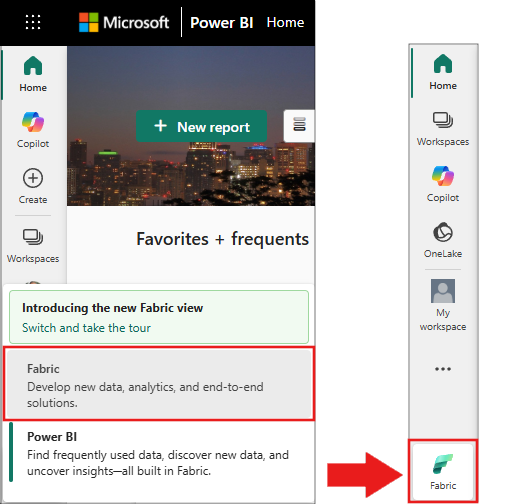
Switch to Fabric by using the experience switcher on the lower-left side of your home page.
- If necessary, create a Microsoft Fabric lakehouse as described in Create a lakehouse in Microsoft Fabric.
- Create a new notebook in your workspace by selecting + and then Notebook. For more information, see Create a notebook.
Understand classification and logistic regression
Classification, a popular machine learning task, involves sorting input data into categories. A classification algorithm figures out how to assign labels to the supplied input data. For example, a machine learning algorithm could accept stock information as input and divide the stock into two categories: stocks that you should sell and stocks that you should keep.
The logistic regression algorithm is useful for classification. The Spark logistic regression API is useful for binary classification of input data into one of two groups. For more information about logistic regression, see Wikipedia.
Logistic regression produces a logistic function that predicts the probability that an input vector belongs to one group or the other.
Predictive analysis example of NYC taxi data
The data is available through the Azure Open Datasets resource. This dataset subset hosts information about yellow taxi trips, including the start times, end times, start locations, end locations, trip costs, and other attributes.
This tutorial uses Apache Spark to perform analysis on the NYC taxi-trip tip data and develop a model to predict whether a particular trip includes a tip.
Create an Apache Spark machine learning model
Create a PySpark notebook. For more information, see Create a notebook.
After you create the notebook, attach it to a lakehouse by selecting Add lakehouse in the left panel.
Import the required types for this notebook. Paste the following code into the first cell and run it.
import matplotlib.pyplot as plt from pyspark.sql.functions import unix_timestamp, date_format, col, when from pyspark.ml import Pipeline from pyspark.ml.feature import RFormula from pyspark.ml.feature import OneHotEncoder, StringIndexer from pyspark.ml.classification import LogisticRegression from pyspark.ml.evaluation import BinaryClassificationEvaluatorVerify: The cell completes without
ImportError. If you see an error, confirm your notebook uses the PySpark runtime.Use MLflow to track your machine learning experiments and corresponding runs. If Microsoft Fabric Autologging is enabled, the corresponding metrics and parameters are automatically captured.
import mlflowVerify: The cell completes without errors. Run
print(mlflow.__version__)to confirm MLflow is available.
Construct the input DataFrame
This example loads the data from Azure Open Datasets storage into an Apache Spark DataFrame. Then, you apply Spark operations to clean and filter the dataset.
Paste the following code into a new cell and run it to create a Spark DataFrame. This step retrieves NYC yellow taxi data filtered to May 2018.
blob_account_name = "azureopendatastorage" blob_container_name = "nyctlc" blob_relative_path = "yellow" wasbs_path = f"wasbs://{blob_container_name}@{blob_account_name}.blob.core.windows.net/{blob_relative_path}" nyc_tlc_df = spark.read.parquet(wasbs_path) \ .filter((col("tpepPickupDateTime") >= "2018-05-01") & (col("tpepPickupDateTime") < "2018-06-01")) \ .repartition(20)Verify: Run the following cell to confirm data loads successfully.
print(f"Loaded {nyc_tlc_df.count()} rows")
# Expected output: Loaded approximately 9,000,000+ rows
Sample the dataset to speed up development and training.
# Sample without replacement to avoid duplicates sampled_taxi_df = nyc_tlc_df.sample(False, 0.001, seed=1234)Verify: Confirm the sample size is manageable.
print(f"Sampled {sampled_taxi_df.count()} rows")
# Expected output: Sampled approximately 9,000-10,000 rows
View the data by using the built-in
display()command to explore the data sample.display(sampled_taxi_df.limit(10))Verify: A table with 10 rows appears showing columns like
tpepPickupDateTime,fareAmount,tipAmount, andtripDistance.
Prepare the data
Data preparation is a crucial step in the machine learning process. It involves cleaning, transforming, and organizing raw data to make it suitable for analysis and modeling. In this section, perform several data preparation steps:
- Filter the dataset to remove outliers and incorrect values.
- Remove columns that aren't needed for model training.
- Create new columns from the raw data.
- Generate a label to determine whether a given taxi trip involves a tip.
Run the following code to select relevant columns, compute derived features, and filter outliers:
taxi_df = sampled_taxi_df.select('totalAmount', 'fareAmount', 'tipAmount', 'paymentType', 'rateCodeId', 'passengerCount',
                    'tripDistance', 'tpepPickupDateTime', 'tpepDropoffDateTime',
                    date_format('tpepPickupDateTime', 'HH').cast('integer').alias('pickupHour'),
                    date_format('tpepPickupDateTime', 'EEEE').alias('weekdayString'),
                    (unix_timestamp(col('tpepDropoffDateTime')) - unix_timestamp(col('tpepPickupDateTime'))).alias('tripTimeSecs'),
                    (when(col('tipAmount') > 0, 1).otherwise(0)).alias('tipped')
                    ) \
            .filter((sampled_taxi_df.passengerCount > 0) & (sampled_taxi_df.passengerCount < 8)
                    & (sampled_taxi_df.tipAmount >= 0) & (sampled_taxi_df.tipAmount <= 25)
                    & (sampled_taxi_df.fareAmount >= 1) & (sampled_taxi_df.fareAmount <= 250)
                    & (sampled_taxi_df.tipAmount < sampled_taxi_df.fareAmount)
                    & (sampled_taxi_df.tripDistance > 0) & (sampled_taxi_df.tripDistance <= 100)
                    & (sampled_taxi_df.rateCodeId <= 5)
                    & (sampled_taxi_df.paymentType.isin({"1", "2"}))
                    )
Important
The date_format function uses the pattern 'HH' (24-hour format, values 0-23) rather than 'hh' (12-hour format, values 1-12). The 24-hour format is required for the time-of-day binning logic that follows.
Next, add the traffic time bins feature based on the hour of day:
taxi_featurised_df = taxi_df.select('totalAmount', 'fareAmount', 'tipAmount', 'paymentType', 'passengerCount',
                                    'tripDistance', 'weekdayString', 'pickupHour', 'tripTimeSecs', 'tipped',
                                    when((col('pickupHour') <= 6) | (col('pickupHour') >= 20), "Night")
                                    .when((col('pickupHour') >= 7) & (col('pickupHour') <= 10), "AMRush")
                                    .when((col('pickupHour') >= 11) & (col('pickupHour') <= 15), "Afternoon")
                                    .when((col('pickupHour') >= 16) & (col('pickupHour') <= 19), "PMRush")
                                    .otherwise("Other").alias('trafficTimeBins')
                                    ) \
                            .filter((taxi_df.tripTimeSecs >= 30) & (taxi_df.tripTimeSecs <= 7200))
Verify: Confirm the traffic time bins are distributed correctly.
taxi_featurised_df.groupBy('trafficTimeBins').count().show()
# Expected output: Shows counts for Night, AMRush, Afternoon, PMRush categories
Create a logistic regression model
The final task converts the labeled data into a format that logistic regression can handle. The input to a logistic regression algorithm must have a label/feature vector pairs structure, where the feature vector is a vector of numbers that represent the input point.
Convert the categorical columns trafficTimeBins and weekdayString into integer representations by using the OneHotEncoder approach:
# Convert categorical features into numeric representations
sI1 = StringIndexer(inputCol="trafficTimeBins", outputCol="trafficTimeBinsIndex")
en1 = OneHotEncoder(inputCol="trafficTimeBinsIndex", outputCol="trafficTimeBinsVec")
sI2 = StringIndexer(inputCol="weekdayString", outputCol="weekdayIndex")
en2 = OneHotEncoder(inputCol="weekdayIndex", outputCol="weekdayVec")

# Apply the encodings to create a new DataFrame
encoded_final_df = Pipeline(stages=[sI1, en1, sI2, en2]).fit(taxi_featurised_df).transform(taxi_featurised_df)
Verify: Confirm the encoded DataFrame has the expected new columns.
print("Columns:", encoded_final_df.columns)
print(f"Row count: {encoded_final_df.count()}")
# Expected output: Columns list includes 'trafficTimeBinsVec' and 'weekdayVec'
Train a logistic regression model
Split the dataset into a training set (70%) and a testing set (30%):
# Split the DataFrame into training and test sets
trainingFraction = 0.7
testingFraction = (1 - trainingFraction)
seed = 1234

train_data_df, test_data_df = encoded_final_df.randomSplit([trainingFraction, testingFraction], seed=seed)
Verify: Confirm the split produced reasonable sizes.
print(f"Training rows: {train_data_df.count()}, Test rows: {test_data_df.count()}")
# Expected output: Approximately 70%/30% split of the encoded data
Create the model formula, train the logistic regression model, and evaluate it by using Area Under the ROC (Receiver Operating Characteristic) Curve:
# Create a logistic regression model
logReg = LogisticRegression(maxIter=10, regParam=0.3, labelCol='label')

# Define the formula: 'tipped' is the response variable, right-hand side are predictors
classFormula = RFormula(formula="tipped ~ pickupHour + weekdayVec + passengerCount + tripTimeSecs + tripDistance + fareAmount + paymentType + trafficTimeBinsVec")

# Train the model using a pipeline
lrModel = Pipeline(stages=[classFormula, logReg]).fit(train_data_df)

# Generate predictions on the test dataset
predictions = lrModel.transform(test_data_df)

# Evaluate using Area Under ROC
evaluator = BinaryClassificationEvaluator(rawPredictionCol="rawPrediction", metricName="areaUnderROC")
auc = evaluator.evaluate(predictions)
print(f"Area under ROC = {auc}")
Verify: The output shows an AUC value. A well-performing model produces a value close to 1.0.
Area under ROC = 0.97 (approximately)
Note
The exact AUC value varies depending on the data sample. Values above 0.90 indicate strong predictive performance for this dataset.
Create a visual representation of the prediction
Build a final visualization to interpret the model results. A ROC curve presents the tradeoff between true positive rate and false positive rate.
# Plot the ROC curve from the model training summary
modelSummary = lrModel.stages[-1].summary

# Extract FPR and TPR values as plain lists
roc_data = modelSummary.roc.select('FPR', 'TPR').toPandas()

plt.figure(figsize=(8, 6))
plt.plot([0, 1], [0, 1], 'r--', label='Random classifier')
plt.plot(roc_data['FPR'], roc_data['TPR'], label=f'Logistic Regression (AUC = {auc:.4f})')
plt.xlabel('False Positive Rate')
plt.ylabel('True Positive Rate')
plt.title('ROC Curve - NYC Taxi Tip Prediction')
plt.legend(loc='lower right')
plt.show()
Verify: A plot appears showing the ROC curve above the red dashed diagonal line. The curve should bow toward the upper-left corner, indicating strong classification performance.

Clean up resources
After you finish this tutorial, delete the notebook and lakehouse to free workspace capacity:
- In your workspace, right-click the notebook and select Delete.
- If you created a lakehouse specifically for this tutorial, right-click it and select Delete.
To preserve the trained model for future use, add the following code before cleanup:
# Save the model to the lakehouse
model_path = "abfss://<your-workspace>@onelake.dfs.fabric.microsoft.com/<your-lakehouse>.Lakehouse/Files/models/taxi_tip_model"
lrModel.write().overwrite().save(model_path)
print(f"Model saved to: {model_path}")
Troubleshooting
| Issue | Cause | Solution |
|---|---|---|
Py4JJavaError when reading parquet |
Network connectivity to Azure blob storage | Verify your Fabric workspace has outbound internet access. Try restarting the Spark session. |
AnalysisException: cannot resolve column |
Column name typo or schema mismatch | Run nyc_tlc_df.printSchema() to inspect available columns. The NYC taxi dataset schema can change between years. |
| Empty DataFrame after filtering | Filter conditions too restrictive for the data window | Increase the date range or check sampled_taxi_df.count() before filtering. |
IllegalArgumentException in StringIndexer |
Unseen labels during transform | Add handleInvalid="skip" to your StringIndexer calls: StringIndexer(inputCol="...", outputCol="...", handleInvalid="skip") |
| Low AUC (below 0.6) | Insufficient data or incorrect feature engineering | Increase the sample fraction (for example, 0.01 instead of 0.001) and verify trafficTimeBins categories are balanced. |
OutOfMemoryError |
Dataset too large for available capacity | Reduce the sample fraction or increase your Fabric capacity tier. |
| ROC plot not displaying | Matplotlib backend issue in notebook | Add %matplotlib inline at the top of the notebook. |
Related content
- Use AI samples to build machine learning models: Use AI samples
- Track machine learning runs using Experiments: Machine learning experiments