Note
Access to this page requires authorization. You can try signing in or changing directories.
Access to this page requires authorization. You can try changing directories.
This article guides you through upgrading an existing Microsoft Identity Manager (MIM) 2016 environment from Service Pack 2 (SP2) to Service Pack 3 (SP3). The following components support in-place upgrade when installed on supported operating systems:
- MIM Synchronization Service
- Standalone MIM Service
- Privileged Access Management (PAM)
- Password Change Notification Service (PCNS)
- MIM Reporting
- MIM Client Extensions
The MIM Portal requires a new deployment on SharePoint Subscription Edition and can't be upgraded.
Note
If all MIM components are deployed on a single server (all-in-one), an in-place upgrade isn't available. Follow the new installation procedure instead.
Prerequisites
Before you start the upgrade:
- Supported operating systems: All servers hosting MIM SP3 components must run Windows Server 2019 or Windows Server 2022. Windows Server 2016 and earlier versions aren't supported. Upgrade the operating system before you apply SP3 if any component is currently hosted on an unsupported platform. Windows Server 2025 isn't currently supported for SP3.
- Required upgrade baseline: You can perform an in-place upgrade to SP3 only from the latest released build of MIM 2016 SP2 (version 4.6.673.0). If a component runs SP1 or an older SP2 update, upgrade it to version 4.6.673.0 first.
- Schedule a maintenance window.
- Back up all MIM databases (for example, MIMService and MIMSynchronizationService) and the MIM Synchronization encryption keys.
- Back up all installation directories.
- Install .NET Framework 4.8.
- Install Microsoft OLE DB Driver for SQL Server.
- Install the Microsoft Visual C++ 2015–2022 Redistributable (x64).
- If not already downloaded, download a copy of the MIM 2016 SP2 installation media (ISO) from the MSDN Subscription download site or Microsoft 365 Admin Center.
- Download the MIM 2016 SP3 installation media (ISO) from the MSDN Subscription download site or Microsoft 365 Admin Center.
- Download the relevant MIM 2016 SP3 upgrade MSP files.
Important
Recommended upgrade order
- Upgrade Synchronization Service
- Upgrade standalone MIM Service (if applicable)
- Deploy the new MIM Portal environment
- Upgrade remaining components.
Prepare the SP2 installation source for SP3 patching
Many MIM components that support in-place upgrade to SP3 are updated by using Windows Installer patches (.msp files). Before you apply any SP3 patch, you must ensure that the original SP2 installation source is available and that the correct SP2 baseline MSI is present. Windows Installer requires this baseline to validate the installed product and sequence the update correctly.
If the SP2 baseline MSI isn't present or is replaced by an SP3 MSI, the patch might fail or incorrectly determine that the product is already upgraded.
Perform the following preparation on each server or workstation that hosts a MIM component (for example, Sync Server, Portal servers, or Service servers) before you run any SP3 MSP update.
The following example demonstrates how to update the MIM 2016 Synchronization Service from SP2 to SP3. The steps are the same for all MIM system components (for example, MIM Service).
Step 1 - Identify the installation source
Run the following PowerShell command in an elevated session to determine the installation source path for the MIM component:
Get-ChildItem HKLM:\SOFTWARE\Microsoft\Windows\CurrentVersion\Uninstall, `
HKLM:\SOFTWARE\WOW6432Node\Microsoft\Windows\CurrentVersion\Uninstall |
Get-ItemProperty |
Where-Object { $_.DisplayName -like "Microsoft Identity*" } |
Select InstallSource
This command returns the InstallSource path used by the original installation.

Record the InstallSource value for each MIM component. This location is where Windows Installer expects to find the original SP2 MSI files during the SP3 upgrade.
Step 1.1 - Verify the drive exists
Verify that the drive of the InstallSource returned in the previous step exists.
- If the drive exists, proceed to Step 2 - Copy the component folder.
- If the drive doesn't exist, continue to Step 1.2 to create it.
Step 1.2 - Create the required drive (if missing)
Create a folder that will act as the mapped drive using the following command:
mkdir C:\Patch
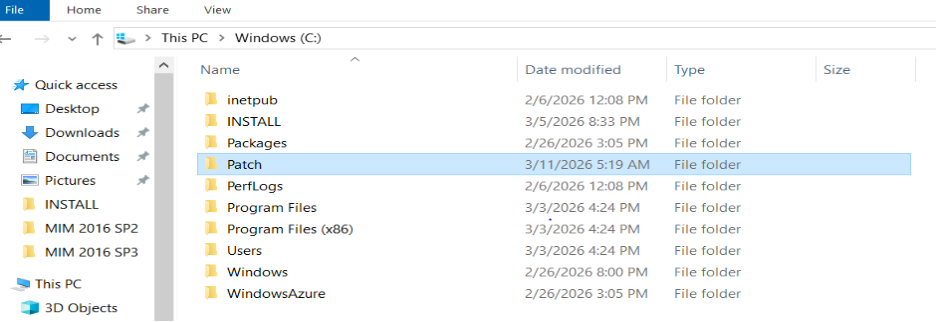
Step 1.3 - Create the virtual drive
Use the SUBST command to create a virtual drive mapping. Run the following command in a Command Prompt window (non-admin):
SUBST E: C:\Patch
Then run the same command again in an elevated Command Prompt:
SUBST E: C:\Patch

After you run the command, a new E: drive should appear.

Step 2 - Copy the component folder
Prepare the installation media:
- If you obtained the artifacts from Volume Licensing (ISO):
- Mount or open the MIM SP3 ISO.
- If you obtained the artifacts from the Microsoft Entra ID P1 or P2 customer download page:
- The files are in
.zipformat. Extract the contents to a local path (for example,C:\Downloads\Synchronization Service).
- The files are in
- If you obtained the artifacts from Volume Licensing (ISO):
Locate the component folder. For example, if you're upgrading the Synchronization Service, locate the Synchronization Service folder in the extracted contents or mounted ISO.
Copy the entire component folder to the
InstallSourcepath (for example,E:\Synchronization Service).
The folder structure must match the InstallSource path identified in Step 1.

Step 3 - Build the installation source
Important
This step ensures the SP2 baseline MSI is in place alongside the SP3 patch file. If the MSI is from SP3 instead of SP2, the patch will fail.
Step 3.1 - Replace the MSI file
- Open the MIM 2016 SP2 ISO.
- Locate the MSI file for your component. For the Synchronization Service, the file is
Synchronization Service.msi. - Copy this file to the
InstallSourcefolder (for example,E:\Synchronization Service). When prompted, replace the existing MSI file.
Use the following table as a reference for SP2 MSI file locations:
| Component | SP2 MSI to copy |
|---|---|
| Synchronization Service | SP2:\Synchronization Service\Synchronization Service.msi |
| Service and Portal | SP2:\Service & Portal\Service & Portal.msi |
| PCNS | SP2:\Password Change Notification Service\x64\Password Change Notification Service.msi |
| Add-ins and Extensions | SP2:\Add-ins and extensions\x64\Add-ins and extensions.msi |
| Language Packs | SP2:\LANGUAGE Packs\Add-ins and Extensions Language Pack\x64\Add-ins and Extensions Language.msi |
| Certificate Management | SP2:\Certificate Management\x64\Certificate Management.msi |
| CM Client | SP2:\CM Client\x64\CM Client.msi |
| CM Bulk Client | SP2:\CM Bulk Client\CM Bulk Client.msi |
If your deployment uses x86 components or non-English languages, select the folder that matches the installed architecture and language.
Step 3.2 - Copy the SP3 patch file
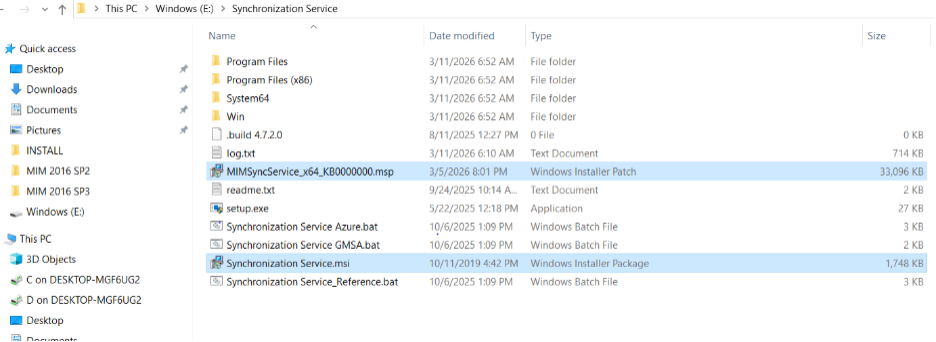
Copy the SP3 patch (MSP) file to the same InstallSource folder. For the Synchronization Service, the file is MIMSyncService_x64_KB5085154.msp.
Step 3.3 - Verify installation files
Verify that the InstallSource folder contains both required files:
- The SP2 MSI (for example,
Synchronization Service.msi) copied from the SP2 ISO - The SP3 MSP (for example,
MIMSyncService_x64_KB5085154.msp) patch file
Upgrade the Synchronization Service
After you complete the preparation steps, apply the SP3 patch to the Synchronization Service.
Verify platform and version
Confirm the OS and installed MIM version meet the prerequisites.
Stop the Synchronization Service
From an elevated PowerShell session, run:
Stop-Service FIMSynchronizationServiceStopping the service prevents synchronization activity and releases the file locks required for patching. Confirm that the service shows a Stopped status before you continue.
Back up the Sync environment
Back up the Sync database and installation directory. SP3 patches can't be rolled back with a standard uninstall.
Eject the SP2 ISO (if mounted)
Before you apply the patch, ensure the MIM 2016 SP2 ISO isn't mounted. Unmount it if necessary to prevent the installer from referencing the wrong source files.
Apply the SP3 patch
From an elevated command prompt, navigate to the
InstallSourcefolder and run the following command:msiexec /p MIMSyncService_x64_KB5085154.msp REINSTALLMODE=emus REINSTALL=ALL /l*v log.txt
Important
Before you run the command, verify that the MSP file name in the command matches the actual SP3 patch file name in the folder (for example,
MIMSyncService_x64_KB5085154.msp). Update the command accordingly if the name differs.These
msiexecswitches control how the installer reinstalls features and updates files and registry values:/p— Applies the specified patch.REINSTALL=ALL— Reinstalls all features.REINSTALLMODE=emus— Reevaluates and overwrites registry entries and files./l*v log.txt— Generates a verbose log file.
Restart the Synchronization Service
If the patch installs successfully, the installation completion screen will appear.

After the patch installs successfully, start the service:
Start-Service FIMSynchronizationServiceVerify the service starts without errors.
Validate synchronization functionality
Open Synchronization Service Manager, confirm Management Agents load, and run a Full Import (Stage Only). Successful execution confirms a healthy upgrade.
Remove temporary source mapping (if used)
If you created a temporary drive mapping earlier, remove it by running:
SUBST E: /D
Resolve common upgrade errors
This section describes common issues that can occur when you apply SP3 patches and how to resolve them.
Insert Disk error
If you receive an Insert Disk error, the installer might be looking for a specific volume label.

The volume label can usually be found in the log.txt file generated by the installer. To resolve this issue, remove the volume label from the registry by running the following PowerShell command:
Get-ChildItem HKLM:\SOFTWARE\Classes\Installer\Products -Recurse |
Get-ItemProperty |
Where-Object {$_.PSObject.Properties.Value -match "MIM-X22-20157"} |
ForEach-Object {
    $path = $_.PSPath
    $_.PSObject.Properties |
    Where-Object {$_.Value -match "MIM-X22-20157"} |
    ForEach-Object {
        Remove-ItemProperty -Path $path -Name $_.Name -ErrorAction SilentlyContinue
    }
}
After you run the command, run the patch command again.
Source file not found error
If you receive a Source file not found error, verify that the SP2 installation media isn't still mounted. Having SP2 mounted can cause a conflict where the installer attempts to reference files from the incorrect source path, resulting in the missing file error.

Unmount the SP2 ISO and run the patch command again.
Upgrade a standalone MIM Service
Use this procedure only when the MIM Service is not co‑located with the MIM Portal. Ensure the server runs Windows Server 2019 or 2022 and the MIM SP2 4.6.673.0 baseline is installed.
Before you begin, complete the preparation steps for the MIM Service component on this server.
Confirm the MIM Service is not co-located with the MIM portal
Verify that the MIM Service is installed on its own server and not sharing the system with the MIM Portal. If it's co‑located, follow the Deploy the MIM Service when it's installed with the Portal procedure instead.
Verify prerequisites on the server
Confirm that the following components are installed before you continue:
- Microsoft .NET Framework 4.8
- Microsoft OLE DB Driver for SQL Server
- Microsoft Visual C++ 2015–2022 Redistributable (x64)
These components enable the SP3 update package to install and register assemblies successfully.
Back up the MIM Service environment
Back up the following items before you continue:
- The FIMService database
- The installation directory at
%ProgramFiles%\Microsoft Forefront Identity Manager\2010\Service - The encryption keys (use
miiskmu.exeif you haven't already secured them)
Because SP3 installs as a patch, you must restore from backup to roll back the upgrade. Completing this step ensures you have a recovery path before you modify the installation.
Stop the MIM Service and IIS
From an elevated PowerShell session, run the following commands to stop the MIM Service and IIS:
Stop-Service FIMService
iisreset /stop
Apply the SP3 patch
From an elevated command prompt in the folder that contains the MSP, run:
msiexec /p MIMService_x64_KB5085154.msp REINSTALL=ALL REINSTALLMODE=emus /l*v MIMServiceSP3.logThis command instructs Windows Installer to update all installed features and overwrite the existing binaries with the SP3 versions while preserving the current configuration. Allow the installation to finish without interruption. A successful installation returns exit code 0 and generates the specified log file.
Restart services
Restart IIS and the MIM Service components by running the following commands:
iisreset /start
Start-Service FIMService
Verify the upgrade
Confirm that the upgrade completed successfully by performing the following checks:
- Open Services and verify that the Forefront Identity Manager Service is running.
- Review the Application event log for any installation or configuration errors.
- Launch the MIM Portal (if it connects to this Service) and confirm that it communicates successfully.
- Run a test workflow or object update to validate Service functionality.
- Verify that the file version of Microsoft.ResourceManagement.Service.exe reflects the SP3 build.
Successfully completing these checks confirms that the Service tier is running with the updated binaries and existing configuration.
Remove temporary source mapping (if used)
If you created a temporary drive mapping earlier, remove it by running:
SUBST E: /DThis command removes the mapping and returns the system to its original configuration.
Deploy the MIM Portal on SharePoint Subscription Edition
MIM 2016 SP3 Portal requires SharePoint Subscription Edition (SE). Because SharePoint 2016 and 2019 can't be upgraded in place to Subscription Edition, you must deploy the MIM Portal to a new SharePoint SE environment rather than upgrade it on the existing server. If the MIM Service is installed on the same server as the Portal, you must also redeploy it.
This guide doesn't include the detailed installation procedures for SharePoint SE, the MIM Portal, or a co‑located MIM Service. You can find those procedures in the MIM 2016 SP3 Deployment Guide, and you must follow them to ensure a supported configuration.
To complete the Portal deployment, use the following documentation:
- Deploy SharePoint Subscription Edition for Microsoft Identity Manager 2016 SP3
- Install the MIM 2016 SP3 Portal on SharePoint Subscription Edition
Deploy the MIM Service when it's installed with the Portal
If your existing environment hosted the MIM Service on the same server as the MIM Portal, you must install a new MIM Service instance as part of the SharePoint Subscription Edition deployment. You must take this approach because you can't reuse the original server after you redeploy the Portal.
Follow the detailed MIM Service installation steps in the Deployment Guide, with one important exception related to database configuration. During installation, when the setup prompts you to configure the MIM Service database, specify the existing FIMService database from the current environment instead of creating a new one. Reusing the existing database preserves configuration data, schema, policies, and workflows, and it's the supported approach when transitioning to SP3 in this topology.
All other installation steps, prerequisites, and configuration settings should match the guidance in the Deployment Guide.
To complete this deployment, refer to:
After installation completes, verify that the Service starts successfully and can communicate with the reused database before you continue with Portal validation.
Upgrade Password Change Notification Service (PCNS)
Upgrade PCNS on each domain controller where it's installed. Unlike other components, PCNS is upgraded by running the SP3 MSI directly (not an MSP). Perform upgrades sequentially across domain controllers to maintain password sync availability.
Verify platform and version
Confirm that the domain controller is running Windows Server 2019 or Windows Server 2022 and that the installed PCNS version matches the latest MIM 2016 SP2 release. This verification ensures the server meets the supported baseline before you install SP3.
Confirm a system state backup exists
Verify that a recent system state backup of the domain controller is available. PCNS installs a password filter DLL, and restoring the domain controller provides the required rollback method if you need to revert the upgrade.
Stop the PCNS service
From an elevated PowerShell session, run:
Stop-Service FIMPCNSConfirm that the service status shows Stopped before you continue.
Run the SP3 PCNS installer
Run the PCNS installation package directly on the domain controller from the SP3 media:
SP3 Media:\Password Change Notification Service\x64\Password Change Notification Service.msiLaunch the MSI from an elevated command prompt or by right‑clicking it and selecting Run as administrator. The installer detects the existing SP2 installation and upgrades it in place.
Restart the domain controller if prompted
Some environments require a restart to reload the updated password filter. If the installer prompts you to reboot, restart the server before you continue.
Validate password change notification
Reset a test user’s password, confirm local DC logging, and verify the Sync Service receives and processes the notification.
Upgrade Add-ins and Extensions
Upgrade Add-ins and Extensions after you update core roles. These components use the SP3 MSP patch model and the same SP2 baseline validation you used for Sync Service and MIM Service.
Verify platform and version requirements
Confirm the OS and installed MIM version meet the baseline requirements.
Close dependent applications
Close Microsoft Outlook, MMC consoles, and any applications that use MIM integrations before you apply the update. Closing these applications prevents file locks that could cause the patch to fail or trigger a repair during installation.
Apply the SP3 patch
From an elevated command prompt in the folder that contains the MSP, run:
msiexec /p MIMAddinsExtensions_x64_KB5085154.msp REINSTALL=ALL REINSTALLMODE=emus /l*v AddinsSP3.logThis command updates the installed binaries while preserving the existing configuration.
Restart the system
Reboot to ensure updated assemblies load and register correctly.
Validate functionality
Open Outlook (if applicable), launch admin tools that rely on extensions, verify certificate/portal integrations, and review the Application event log for Windows Installer repair actions.