After you enable Hyper-V Replica and replicate a virtual machine (VM), you can perform failover operations to switch the VM to the replica host or cluster. This article explains how to perform different types of failover operations by using Hyper-V Replica with Windows Admin Center - Virtualization mode, Hyper-V Manager, Failover Cluster Manager, or PowerShell.
For more information about Hyper-V Replica, or if you need to enable replication or replicate a VM, see the following articles:
Failover scenarios
Hyper-V Replica supports the following three failover scenarios.
Test failover: creates a test VM on the replica host or cluster without affecting the ongoing replication. It enables you to verify that the replica VM is functioning correctly. After testing, you can stop the test failover to remove the test VM.
By default, the test VM is created from the latest recovery point and isn't connected to a network. If you configured extra recovery points, you can choose to create the test VM from one of those points. You can only run one test failover on a VM at a time.
Planned failover: use when you can gracefully shut down the primary VM. It helps you to perform an end-to-end validation of your recovery plan. It ensures that all changes are replicated to the replica before switching over, resulting in zero data loss. After the planned failover, you can optionally reverse replication back to the original primary host or cluster, then fail back the VM to the original location.
Planned failover isn't a substitute for high availability, but it can enable you to keep your workloads running with minimal downtime without data loss. It can be useful for events such as planned maintenance of an entire site or datacenter.
Unplanned failover: use when the primary VM is unavailable due to a failure, such as a power outage. It enables you to switch to the replica VM by using the latest recovery point or previous recovery points, if configured. After the unplanned failover, you can complete the failover process and optionally reverse replication back to the original primary host or cluster, then fail back the VM to the original location.
Unplanned failover is designed for disaster recovery scenarios where the primary VM can't be gracefully shut down. It might result in some data loss, depending on the recovery point selected.
Prerequisites
Before you begin, make sure you meet the following prerequisites:
You have a VM that you're replicating by using Hyper-V Replica.
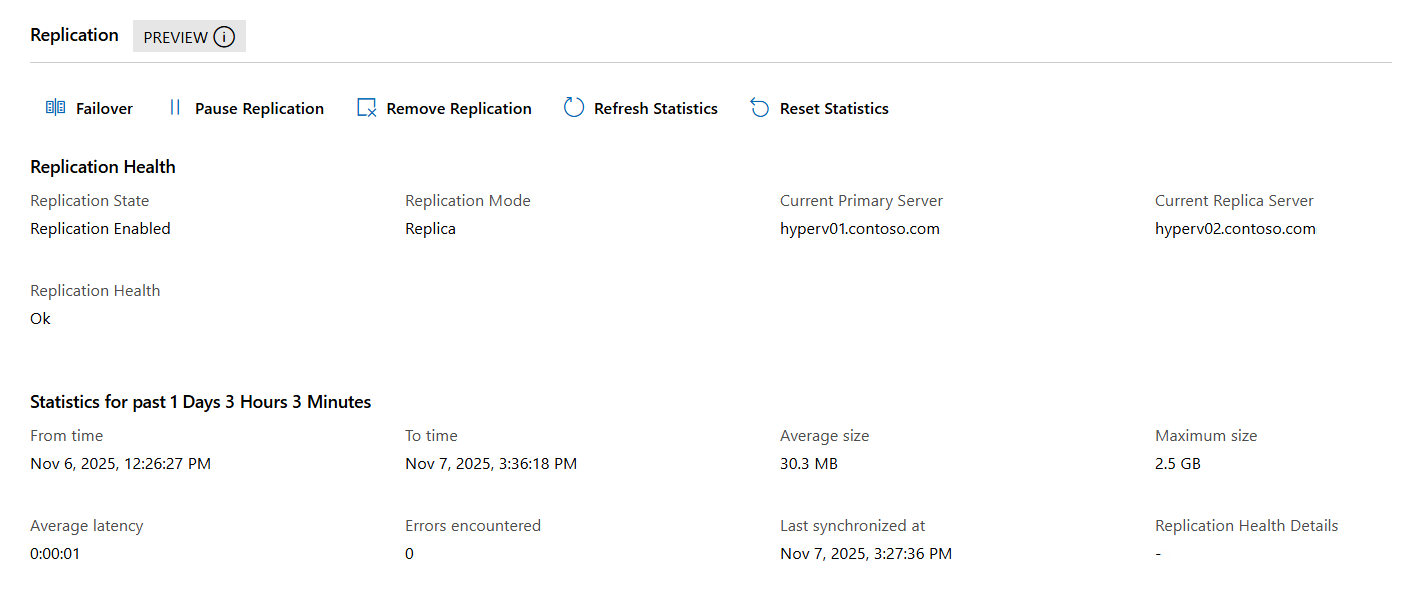
The VM's replication health state is Normal. To check the replication health, see Monitor replication progress.
A user account that's a member of the Hyper-V Administrators security group on each host. In an Active Directory domain, you can add users or groups to this group by using Group Policy Preferences. Alternatively, the account can be a local administrator on each host. For more information about the Hyper-V Administrators group, see Active Directory Security Groups.
If you want to control the static IP address a VM uses after failover, configure static IP injection before performing a failover. For more information, see Configure static IP injection for failover.
Fail over a virtual machine
You need to run a failover operation for each VM. You can only run one failover operation at a time for a VM. You can run each failover operation by using the following combinations:
- Hyper-V Manager on clusters or single hosts
- Failover Cluster Manager on clusters
- PowerShell on clusters or single hosts
- Windows Admin Center - Virtualization mode on clusters or single hosts.
Select the relevant tab for instructions.
Important
Configuring Hyper-V Replica using Windows Admin Center - Virtualization mode is currently in PREVIEW.
This information relates to a prerelease product that may be substantially modified before it's released. Microsoft makes no warranties, expressed or implied, with respect to the information provided here.
For more information about Windows Admin Center - Virtualization mode, see Windows Admin Center - Virtualization mode overview.
Failing over a virtual machine by using Windows Admin Center - Virtualization mode depends on the type of failover you want to perform.
Planned failover using Windows Admin Center
To run a planned failover using Windows Admin Center - Virtualization mode:
Go to your URL for Windows Admin Center - Virtualization mode and sign in.
In the resources pane, expand the host that contains the primary VM you want to perform a planned failover, and then select the VM to enter its overview.
Shut down the VM if it's running. You must shut down the VM to perform a planned failover.
In the Replication section, select Planned Failover.

In the pane that opens, review the summary of the planned failover, and then select Fail Over. The failover process begins and the replication state is Prepared for planned failover. If you want to cancel the planned failover at this point, select Cancel Planned Failover.

In the resources pane, select the host that has the replica VM.
From the list of tools for the host, select Virtual machines, and then select the replica VM to enter its overview.
In the Replication section, select Failover.
In the pane that opens, check the box if you want to Start the Replica virtual machine after failover, depending on your requirements. By default, the replica VM starts after failover. Don't forget to attach the VM to a network if necessary. Then select Fail Over to begin the process. Once the failover is complete, in the replication section the replication state changes to Failover Complete.

To complete the planned failover, in the Replication section select Remove Recovery Points. For the confirmation, select Yes. This action removes the recovery points and merges the replica checkpoint. At this point, failover is complete. To reverse the replication direction, see Reverse replication using Windows Admin Center - Virtualization mode.

Start the VM if it isn't already running. Don't forget to attach the VM to a network if necessary.
Unplanned failover using Windows Admin Center
To run a test failover using Windows Admin Center - Virtualization mode:
Go to your URL for Windows Admin Center - Virtualization mode and sign in.
In the resources pane, select the host that contains the replica VM you want to perform an unplanned failover.
From the list of tools for the host, select Virtual machines, then select the replica VM to enter its overview.
In the Replication section, select Failover.
In the pane that opens, review the summary of the unplanned failover, select a recovery point to use from the drop-down list, then select Fail Over. The failover process begins.

The process creates a checkpoint for the replica VM. You should start the VM and perform tests that you require to verify that the recovery point you chose functions correctly. Don't forget to attach the VM to a network if necessary.
If you need to select a different recovery point, you can cancel the failover by selecting Cancel Planned Failover. Then you can choose a different recovery point.
Once you test the VM and don't need to revert to a different recovery point, you need to complete the failover. In the Replication section, select Remove Recovery Points. This action removes the recovery points and merges the checkpoint, which means you can't revert to an earlier recovery point. If you want to keep extra recovery points, you can first export the replica VM before completing failover.

At this point failover is complete, however the replication health shows as Warning because that replication direction isn't configured. To configure reverse replication, see Reverse replication using Windows Admin Center - Virtualization mode.
Test failover using Windows Admin Center - Virtualization mode
To run a test failover using Windows Admin Center - Virtualization mode:
Go to your URL for Windows Admin Center - Virtualization mode and sign in.
In the resources pane, expand the host that contains the replica VM you want to test, then select the VM to enter its overview.
Scroll to the Replication section, then select Test Failover.
In the pane that opens, select the recovery point to use from the drop-down list, then select Failover.
The host creates a duplicate test VM. The VM name is the original VM name with - Test appended. The duplicate VM isn't connected to a network by default. Start the VM and perform tests that you require to verify that it functions correctly.
When you finish testing, in the Replication section select Cancel Test Failover. In the confirmation dialog, select Yes to delete the test VM and discard its data.
Reverse replication using Windows Admin Center - Virtualization mode
After a planned or unplanned failover is complete, you can reverse the replication direction so that changes made on the new primary (formerly the replica) are replicated back to the original primary host or cluster. This step is necessary to restore bidirectional protection.
To configure reverse replication by using Windows Admin Center - Virtualization mode:
Go to your URL for Windows Admin Center - Virtualization mode and sign in.
In the resources pane, expand the host that contains the VM where failover is complete (the VM that is now running as the primary), then select the VM to enter its overview.
Scroll to the Replication section, select Reverse Replication to open the Reverse Replication wizard.
For the Replication Connection tab, complete the following information, then select Replication Configuration to continue:
For Replica server, enter the FQDN or NetBIOS name of the original primary host or Hyper-V Replica Broker.
For Replica server port, enter the port number.
For Authentication type, select the correct authentication method. If you're using certificate-based authentication, select Select to choose the certificate. If you want to compress data, check the box.
For the Replication Configuration tab, configure the replication frequency and recovery point settings, then select Initial Replication to continue.
For the Initial Replication tab, select the initial replication method, then select Review.
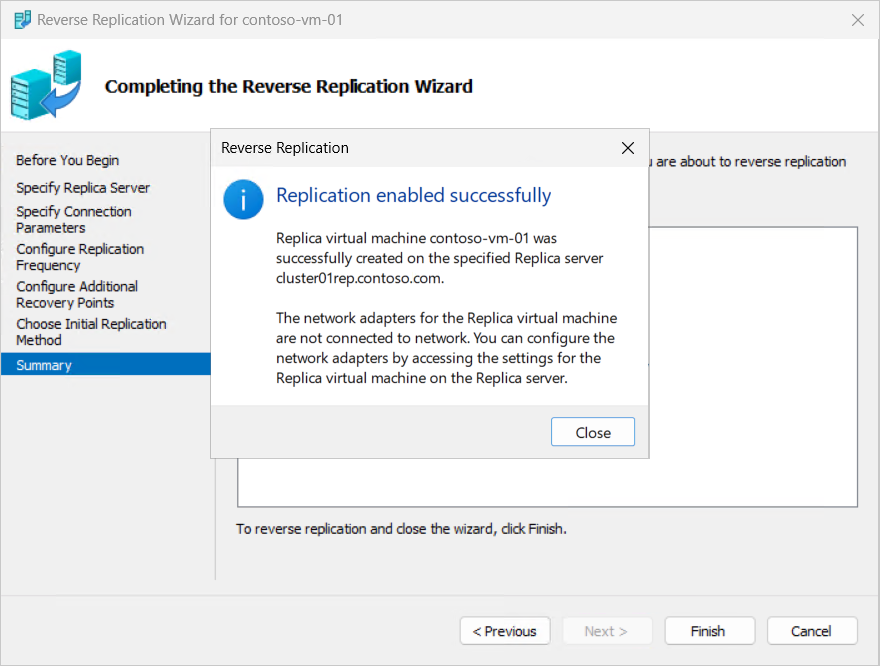
Review the summary information, then select Enable Replication.
Reverse replication begins. The replication health returns to Ok and changes are replicated to the original primary host. To return to the original replication direction, you can perform a planned failover.
Failing over a virtual machine by using Hyper-V Manager depends on the type of failover you want to perform.
Test failover by using Hyper-V Manager
To run a test failover by using Hyper-V Manager, follow these steps:
Open Hyper-V Manager on a device you use to manage a host in the replica cluster or a replica single host with the VM, or on the host itself where Windows Server with Desktop Experience is installed.
In the resources pane, select the host that contains the replica VM for which you want to run a test failover.
Right-click the VM, select Replication, then select Test Failover.
In the Test Failover screen, select the recovery point you want to use for the test failover from the drop-down list, then select Test Failover.

The host creates a duplicate VM. The VM name is the original VM name with - Test appended. The duplicate VM isn't connected to a network by default. At this point, you can start the VM and perform tests that you require to verify that it functions correctly.
When you finish testing, right-click the replica VM (not the test duplicate), select Replication, then select Stop Test Failover. In the confirmation dialog, select Stop Test Failover to delete the test VM and discard its data.
Planned failover using Hyper-V Manager
To run a planned failover using Hyper-V Manager:
Open Hyper-V Manager on a device you use to manage a host in the primary cluster or a primary single host with the VM, or on the host itself where Windows Server with Desktop Experience is installed.
In the resources pane, select the host that contains the VM for which you want to run a planned failover.
Shut down the VM if it's running. You must shut down the VM to perform a planned failover.
Right-click the VM, select Replication, then select Planned Failover.
In the Planned Failover screen, check the box to Reverse the replication direction after failover and optionally check the box to Start the Replica virtual machine after failover, depending on your requirements. The dialog shows a list of the prerequisite checks and actions the planned failover does. By default, the replica VM starts after failover. Don't forget to attach the VM to a network if necessary.

Select Fail Over to begin the process.

At this point, failover is complete. If you selected the option to reverse the replication direction, replication is automatically reconfigured to replicate changes back to the original primary host or cluster. Alternatively, right-click the replica VM, select Replication, then select Reverse Replication to manually configure replication back to the original primary host or cluster. Once reverse replication is configured, the replication health returns to Normal.
Start the VM if it isn't already running by right-clicking the VM, then selecting Start. Remember to attach the VM to a network if necessary.
Unplanned failover using Hyper-V Manager
To run an unplanned failover using Hyper-V Manager:
Open Hyper-V Manager on a device you use to manage a host in the replica cluster or a replica single host with the VM, or on the host itself where Windows Server with Desktop Experience is installed.
In the resources pane, select the host that contains the replica VM for which you want to run an unplanned failover.
Right-click the replica VM, select Replication, then select Failover.
In the Failover screen, select the recovery point you want to use for the failover from the drop-down list, then select Fail Over.

The process creates a checkpoint for the replica VM and then starts the VM. You should perform tests that you require to verify that the recovery point you chose functions correctly. Don't forget to attach the VM to a network if necessary.
If you need to select a different recovery point, you can cancel the failover by right-clicking the replica VM, select Replication, then select Cancel Failover. Then you can choose a different recovery point.
Once you test the VM and don't need to revert to a different recovery point, you need to complete the failover. Right-click the replica VM, select Replication, then select Remove Recovery Points. This action removes the recovery points and merges the checkpoint, which means you can't revert to an earlier recovery point. If you want to keep extra recovery points, you can first export the replica VM before completing failover.

At this point failover is complete, but the replication health shows as Warning because that replication direction isn't configured.
Reverse replication after unplanned failover using Hyper-V Manager
Once the primary VM is available again, you should replicate the changes made to the replica VM back to the original primary VM. The process is called Reverse replication. Before you can reverse the replication, you need to mark the original primary VM as able to be a target to receive replication. You can't perform this action in Hyper-V Manager.
On the original primary host that contains the original primary VM, open a PowerShell session as an administrator, or connect remotely using the Enter-PSSession cmdlet on a device you use to manage the host.
Mark the original primary VM to be a target to receive replication by running the following command. Be sure to replace placeholder <VMName> with the name of the original primary VM.
Set-VMReplication -VMName '<VM Name>' -AsReplica
Check the status of the original primary VM by running the following command on the primary host:
Get-VMReplication -VMName '<VM Name>' | FL VMName, ReplicationMode, ReplicationState
Here's an example of the output, which shows that the primary VM is now configured as a replica and is waiting for replication:
VMName           : contoso-vm-01
ReplicationMode  : Replica
ReplicationState : WaitingForInitialReplication
On the replica host that contains the replica VM, in Hyper-V Manager right-click the replica VM, select Replication, then select Reverse Replication. In the Reverse Replication screen, if you see Before You Begin, select Next.
The options in the wizard are prepopulated based on the settings of the original primary VM. If you don't need to change any settings, select Next on each screen until you reach the Summary screen, then select Finish to begin the reverse replication. Alternatively the options are the same as when you initially enabled replication for the VM.
At this point, any changes are replicated and the replication health returns to Normal. The primary and replica roles have now swapped. To return to the original replication direction, you can perform a planned failover, as described in the Planned failover section.
Failing over a virtual machine by using Failover Cluster Manager depends on the type of failover you want to perform.
Test failover by using Failover Cluster Manager
To run a test failover by using Failover Cluster Manager:
Open Failover Cluster Manager on a device you use to manage the replica cluster with the VM, or on one of the hosts in the cluster where Windows Server with Desktop Experience is installed.
In the resources pane, expand the name of your cluster that contains the replica VM for which you want to run a test failover, then select Roles.
Right-click the replica VM, select Replication, then select Test Failover.
In the Test Failover screen, select the recovery point you want to use for the test failover from the drop-down list, then select Test Failover.
A duplicate VM is created on the cluster. The VM is named with the original VM name appended with - Test. The duplicate VM isn't connected to a network by default. At this point, you can start the VM and perform tests that you require to verify that it functions correctly.
When you finish testing, right-click the replica VM (not the test duplicate), select Replication, then select Stop Test Failover. In the confirmation dialog, select Stop Test Failover to delete the test VM and discard its data.
Planned failover using Failover Cluster Manager
To run a planned failover using Failover Cluster Manager, follow these steps:
Open Failover Cluster Manager on a device you use to manage the primary cluster with the VM, or on one of the hosts in the cluster where Windows Server with Desktop Experience is installed.
In the resources pane, expand the name of your cluster that contains the VM for which you want to run a planned failover, then select Roles.
Shut down the VM if it's running. You must shut down the VM to perform a planned failover.
Right-click the VM, select Replication, then select Planned Failover.
In the Planned Failover screen, check the box to Reverse the replication direction after failover and optionally check the box to Start the Replica virtual machine after failover, depending on your requirements. The dialog shows a list of the prerequisite checks and actions the planned failover does. By default, the replica VM starts after failover. Don't forget to attach the VM to a network if necessary.
Select Fail Over to begin the process.
At this point, failover is complete. If you selected the option to reverse the replication direction, replication is automatically reconfigured to replicate changes back to the original primary host or cluster. Alternatively, right-click the replica VM, select Replication, then select Reverse Replication to manually configure replication back to the original primary host or cluster. Once reverse replication is configured, the replication health returns to Normal.
Start the VM if it isn't already running by right-clicking the VM, then selecting Start. Remember to attach the VM to a network if necessary.
Unplanned failover using Failover Cluster Manager
To run an unplanned failover using Failover Cluster Manager, follow these steps:
Open Failover Cluster Manager on a device you use to manage the replica cluster with the VM, or on one of the hosts in the cluster where Windows Server with Desktop Experience is installed.
In the resources pane, expand the name of your cluster that contains the replica VM for which you want to run an unplanned failover, then select Roles.
Right-click the replica VM, select Replication, then select Failover.
In the Failover screen, select the recovery point you want to use for the failover from the drop-down list, then select Fail Over.
The process creates a checkpoint for the replica VM and then starts the VM. You should perform tests that you require to verify that the recovery point you chose functions correctly. Don't forget to attach the VM to a network if necessary.
If you need to select a different recovery point, you can cancel the failover by right-clicking the replica VM, select Replication, then select Cancel Failover. Then you can choose a different recovery point.
Once you test the VM and don't need to revert to a different recovery point, you need to complete the failover. Right-click the replica VM, select Replication, then select Remove Recovery Points. This action removes the recovery points and merges the checkpoint, which means you can't revert to an earlier recovery point. If you want to keep extra recovery points, you can first export the replica VM before completing failover.
At this point failover is complete, but the replication health shows as Warning because that replication direction isn't configured.
Reverse replication after unplanned failover using Failover Cluster Manager
Once the primary VM is available again, you should replicate the changes made to the replica VM back to the original primary VM. The process is called Reverse replication. Before you can reverse the replication, you need to mark the original primary VM as able to be a target to receive replication. You can't perform this action in Failover Cluster Manager.
On the original primary host that contains the original primary VM, open a PowerShell session as an administrator, or connect remotely using the Enter-PSSession cmdlet on a device you use to manage the host.
Mark the original primary VM to be a target to receive replication by running the following command. Be sure to replace placeholder <VMName> with the name of the original primary VM.
Set-VMReplication -VMName '<VM Name>' -AsReplica
Check the status of the original primary VM by running the following command on the primary host:
Get-VMReplication -VMName '<VM Name>' | FL VMName, ReplicationMode, ReplicationState
Here's an example of the output, which shows that the primary VM is now configured as a replica and is waiting for replication:
VMName           : contoso-vm-01
ReplicationMode  : Replica
ReplicationState : WaitingForInitialReplication
On the replica host that contains the replica VM, in Failover Cluster Manager right-click the replica VM, select Replication, then select Reverse Replication. In the Reverse Replication screen, if you see Before You Begin, select Next.
The options in the wizard are prepopulated based on the settings of the original primary VM. If you don't need to change any settings, select Next on each screen until you reach the Summary screen, then select Finish to begin the reverse replication. Alternatively the options are the same as when you initially enabled replication for the VM.
At this point, any changes are replicated and the replication health returns to Normal. The roles of the replica VM and the primary VM have now swapped. To return to the original replication direction, you can perform a planned failover, as described in the Planned failover section.
Failing over a virtual machine by using PowerShell depends on the type of failover you want to perform. You can use cmdlets in the Hyper-V module, as shown in the following examples. Be sure to replace placeholder <values> with your own.
Test failover by using PowerShell
To run a test failover by using PowerShell:
Open a PowerShell session as an administrator on the host in the replica cluster or the replica single host with the VM. Or, connect remotely by using the Enter-PSSession cmdlet on a device you use to manage the cluster or host.
Initiate a test failover by running the following command. Confirm the action when prompted. By default, the latest recovery point is used. To use a different recovery point, you can combine Get-VMSnapshot and pipe it to the Start-VMFailover cmdlet. For an example, see Start-VMFailover.
Start-VMFailover -VMName '<VM Name>' -AsTest
A duplicate VM is created on the host. The VM is named with the original VM name appended with - Test. The duplicate VM isn't connected to a network by default. At this point, you can start the VM and perform tests that you require to verify that it functions correctly. Run the following command to start the test VM:
Start-VM -Name '<VM Name> - Test'
After you finish testing, run the following command to stop the test failover. Stopping the test failover deletes the test VM and discards its data.
Stop-VMFailover -VMName '<VM Name>'
Planned failover using PowerShell
To run a planned failover using PowerShell:
Open a PowerShell session as an administrator on the host in the primary cluster or the primary single host with the VM, or connect remotely by using the Enter-PSSession cmdlet on a device you use to manage the cluster or host.
Shut down the VM if it's running. You must shut down the VM to perform a planned failover.
Stop-VM -Name '<VM Name>'
Prepare the VM for failover by running the following command, which replicates any pending changes.
Start-VMFailover -VMName '<VM Name>' -Prepare
Open a PowerShell session as an administrator on the host in the replica cluster or the replica single host with the VM. Or, connect remotely by using the Enter-PSSession cmdlet on a device you use to manage the cluster or host.
Initiate the planned failover by running the following command. Confirm the action when prompted. The latest recovery point is used by default. To use a different recovery point, you can combine Get-VMSnapshot and pipe it to the Start-VMFailover cmdlet. For an example, see Start-VMFailover.
Start-VMFailover -VMName '<VM Name>'
Reverse the replication direction to complete the planned failover by running the following command. Reverse replication uses the same settings as when you initially enabled replication for the VM.
Set-VMReplication -VMName '<VMName>' -Reverse
At this point, any changes are replicated and the replication health returns to Normal. Start the VM by running the following command and perform tests that you require to verify that the recovery point you chose functions correctly. Don't forget to attach the VM to a network if necessary.
Start-VM -Name '<VM Name>'
Unplanned failover using PowerShell
To run an unplanned failover using PowerShell:
Open a PowerShell session as an administrator on the host in the replica cluster or the replica single host with the VM. Or, connect remotely by using the Enter-PSSession cmdlet on a device you use to manage the cluster or host.
Initiate an unplanned failover by running the following command. Confirm the action when prompted. The latest recovery point is used by default. To use a different recovery point, you can combine Get-VMSnapshot and pipe it to the Start-VMFailover cmdlet. For an example, see Start-VMFailover.
Start-VMFailover -VMName '<VM Name>'
The process creates a checkpoint for the replica VM, but doesn't start the VM. You should start the VM by running the following command and perform tests that you require to verify that the recovery point you chose functions correctly. Don't forget to attach the VM to a network if necessary.
Start-VM -Name '<VM Name>'
Once you test the VM and don't need to revert to a different recovery point, you need to complete the failover. Run the following command and confirm the action when prompted. This action removes the recovery points and merges the checkpoint, which means you can't revert to an earlier recovery point. If you want to keep extra recovery points, you can first export the replica VM before completing failover. At this point failover is complete, however the replication health shows as Warning because that replication direction isn't configured.
Complete-VMFailover -VMName '<VM Name>'
Check that failover of the replica VM is complete by running the following command:
Get-VMReplication -VMName '<VM Name>' | FL VMName, ReplicationMode, ReplicationState
Here's an example of the output, which shows that the replica VM is now in a failed over state:
VMName           : contoso-vm-01
ReplicationMode  : Replica
ReplicationState : FailedOver
Reverse replication after unplanned failover using PowerShell
Once the primary VM is available again, you should replicate the changes made to the replica VM back to the original primary VM. The process is called Reverse replication. Before you can reverse the replication, you need to mark the original primary VM as able to be a target to receive replication.
On the original primary host that contains the original primary VM, open a PowerShell session as an administrator, or connect remotely using the Enter-PSSession cmdlet on a device you use to manage the host.
Mark the original primary VM to be a target to receive replication by running the following command:
Set-VMReplication -VMName '<VM Name>' -AsReplica
Check the status of the original primary VM by running the following command on the primary host:
Get-VMReplication -VMName '<VM Name>' | FL VMName, ReplicationMode, ReplicationState
Here's an example of the output, which shows that the primary VM is now configured as a replica and is waiting for replication:
VMName           : contoso-vm-01
ReplicationMode  : Replica
ReplicationState : WaitingForInitialReplication
On the replica host that contains the replica VM, reverse the replication by running the following command. Reverse replication uses the same settings as when you initially enabled replication for the VM. If you want to change any settings, pass the relevant parameters to the cmdlet. For more information, see Set-VMReplication.
Set-VMReplication -VMName '<VMName>' -Reverse -ReplicaServerName '<Replica cluster broker or server FQDN>'
Start replication by running the following command:
Start-VMInitialReplication -VMName '<VM Name>'
At this point, any changes are replicated and the replication health returns to Normal. Check the status of the replica VM by running the following command:
Get-VMReplication -VMName '<VM Name>' | FL VMName, ReplicationMode, ReplicationState
Here's an example of the output, which shows that the replica VM is now configured as a primary and is replicating changes:
VMName           : contoso-vm-01
ReplicationMode  : Primary
ReplicationState : Replicating
The roles of the replica VM and the primary VM have now swapped. To return to the original replication direction, you can perform a planned failover, as described in the Planned failover section.


