Note
Access to this page requires authorization. You can try signing in or changing directories.
Access to this page requires authorization. You can try changing directories.
Important
Azure CDN Standard from Microsoft (classic) retires on September 30, 2027. Because the service is retiring, it no longer supports profile creation, new domain onboarding, or managed certificates. To avoid service disruption, migrate to Azure Front Door Standard or Premium. For more information, see Azure CDN Standard from Microsoft (classic) retirement.
Azure Front Door Standard and Premium tier bring the latest cloud delivery network features to Azure. By using enhanced security features and an all-in-one service, your application content is secured and closer to your end users through the Microsoft global network. This article guides you through the migration process to move your Azure CDN from Microsoft (classic) profile to either a Standard or Premium tier profile.
Prerequisites
Review the About Azure CDN from Microsoft (classic) migration article.
Validate compatibility
Go to your Azure CDN from Microsoft (classic) resource and select Migration from under Settings.
Select Validate to see if your Azure CDN from Microsoft (classic) profile is compatible for migration. Validation can take up to two minutes depending on the complexity of your CDN profile.
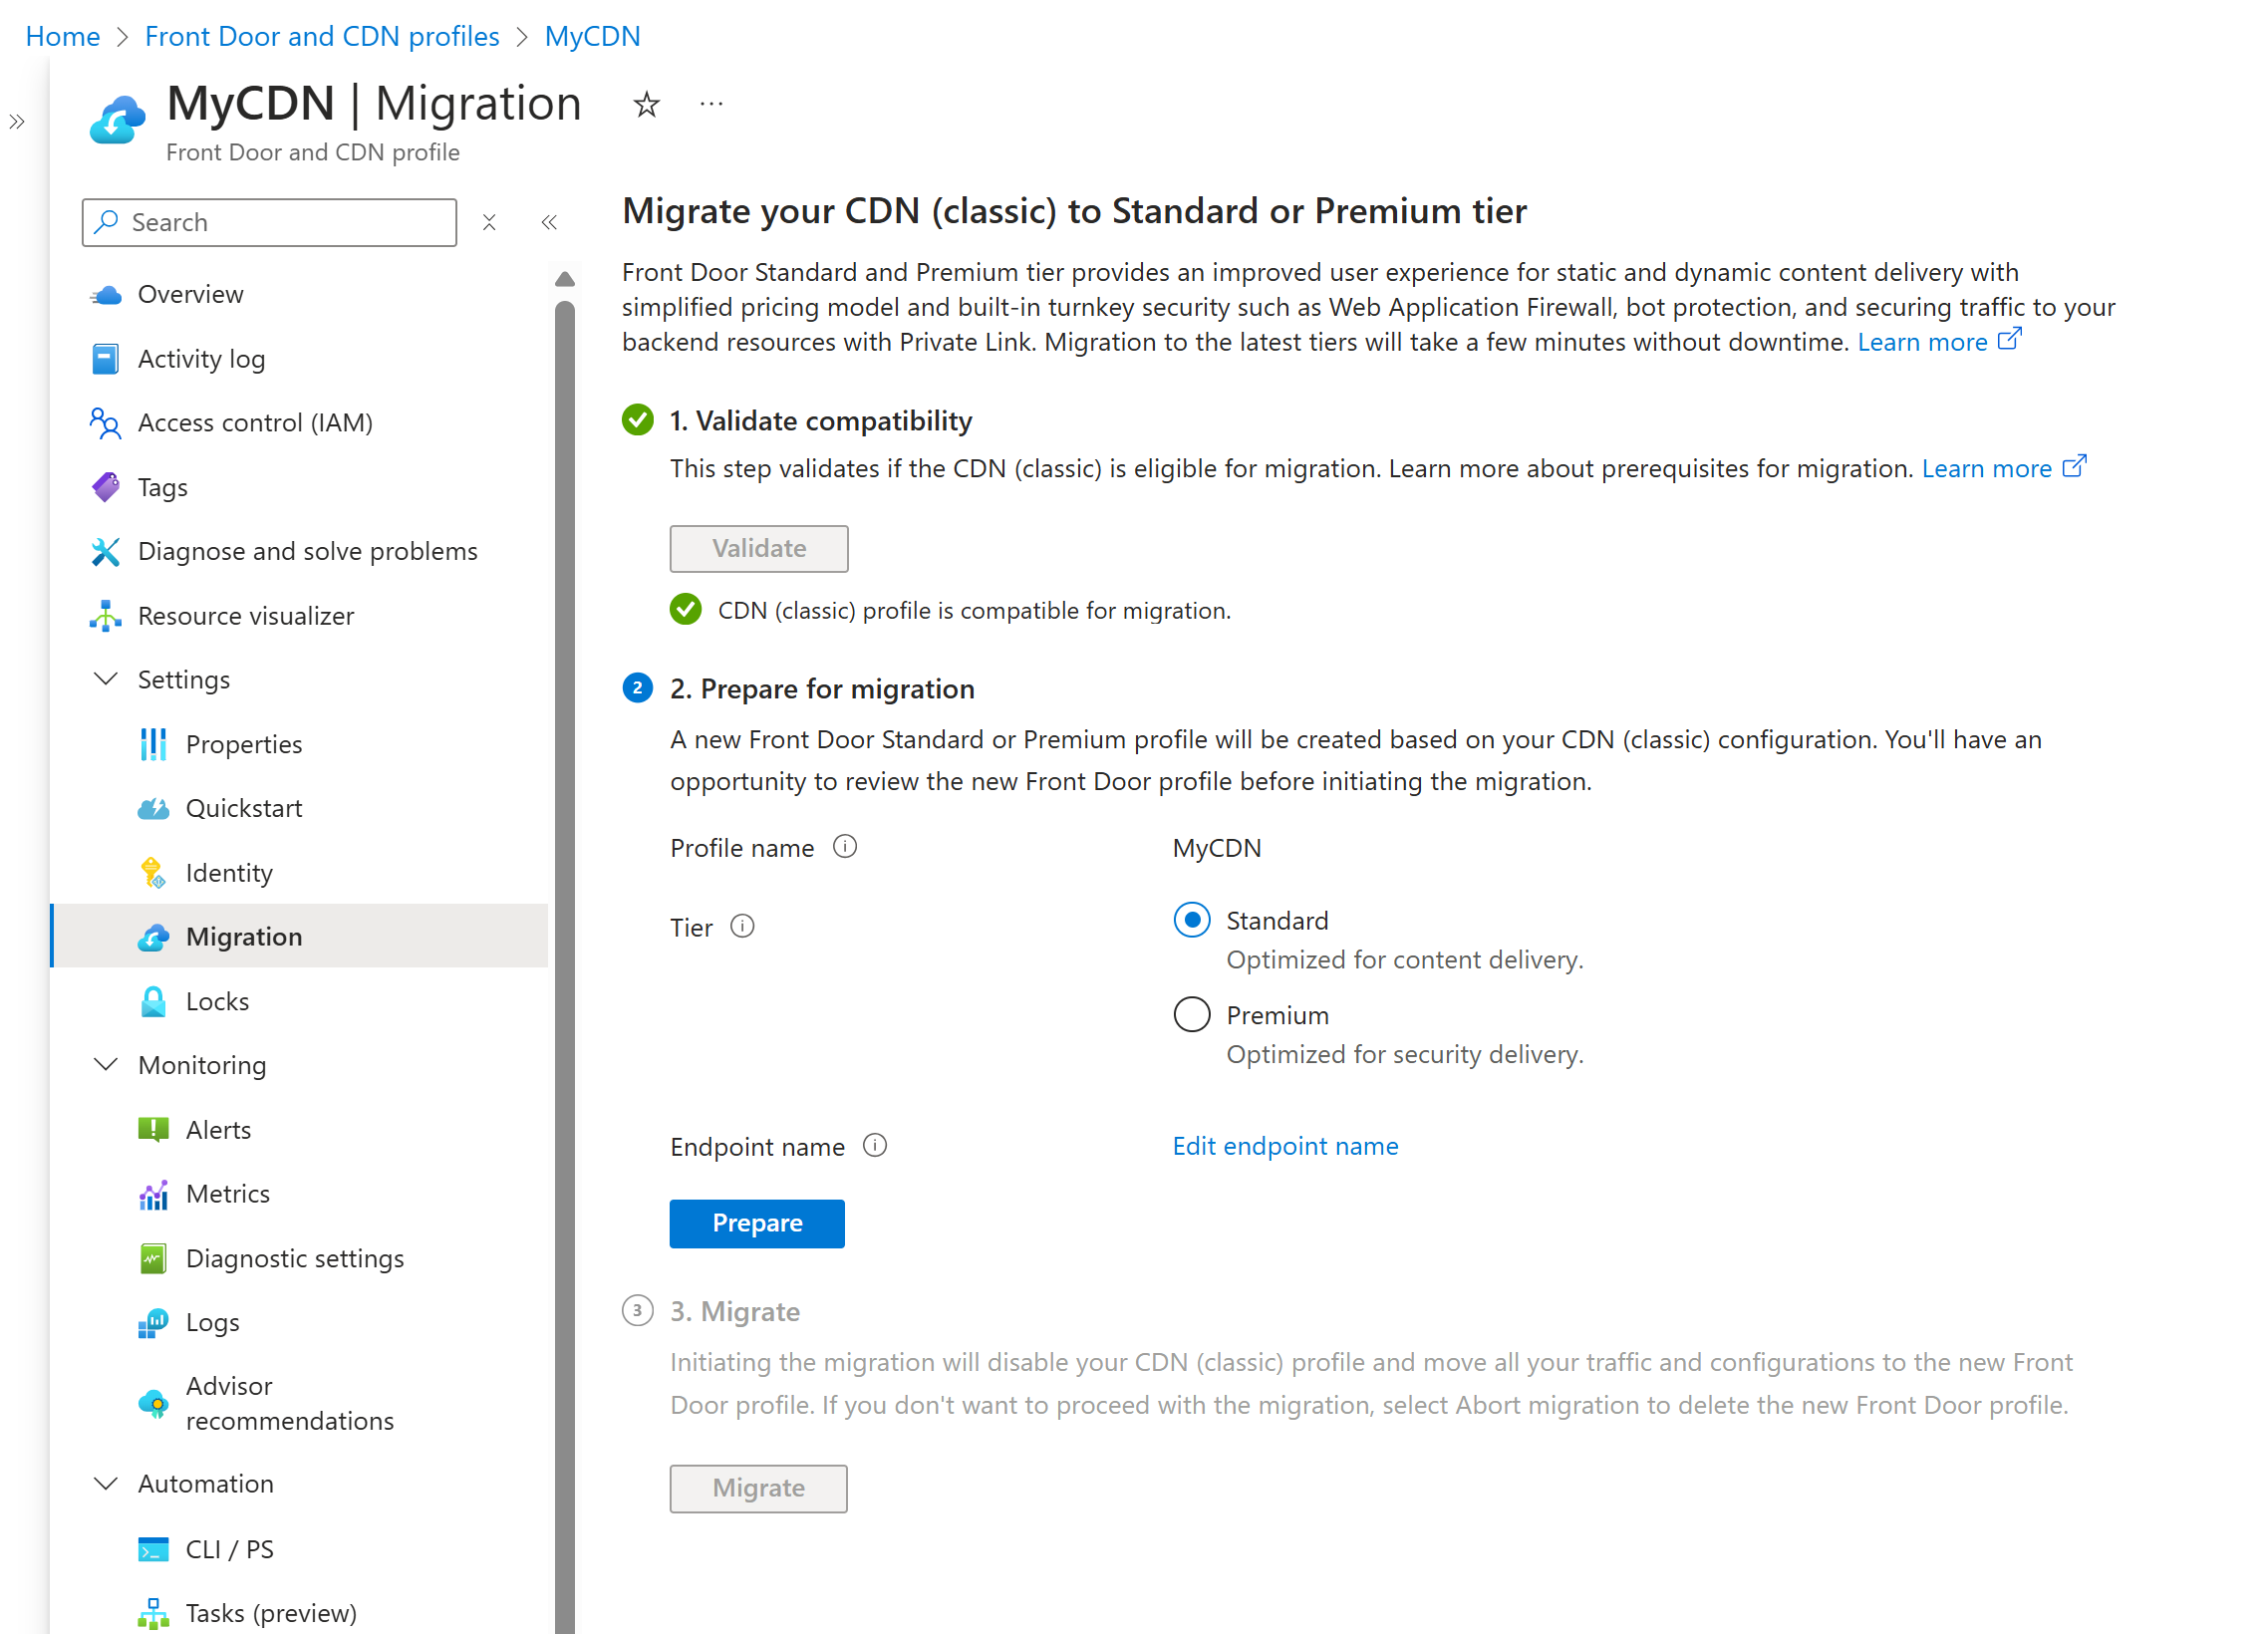
If the migration isn't compatible, select View errors to see the list of errors and recommendations to resolve them.
Once your Azure CDN from Microsoft (classic) profile validates and is compatible for migration, you can move onto the prepare phase.
Prepare for migration
The Azure Front Door profile name stays the same as the Azure CDN from Microsoft (classic) profile name. You can't change this name.
Select Standard or Premium tier based on your business requirements. Select the Premium tier to take advantage of the full feature set of Azure Front Door.
Note
If your Azure CDN from Microsoft (classic) profile can migrate to the Standard tier but the number of resources exceeds the Standard tier limits, you'll be migrated to the Premium tier.
Change the endpoint name if the CDN endpoint name length exceeds the maximum of 46 characters. This change isn't required if the endpoint name is within the character limit. For more information, see Azure Front Door endpoints. Since the maximum endpoint length for Azure Front Door is 64 characters, Azure adds a 16 character hash to the end of the endpoint name to ensure uniqueness and to prevent subdomain takeovers.
If you have geo filtering rules in Azure CDN, Azure Front Door creates a Web Application Firewall (WAF) custom rule with the same tier as the Front Door profile.
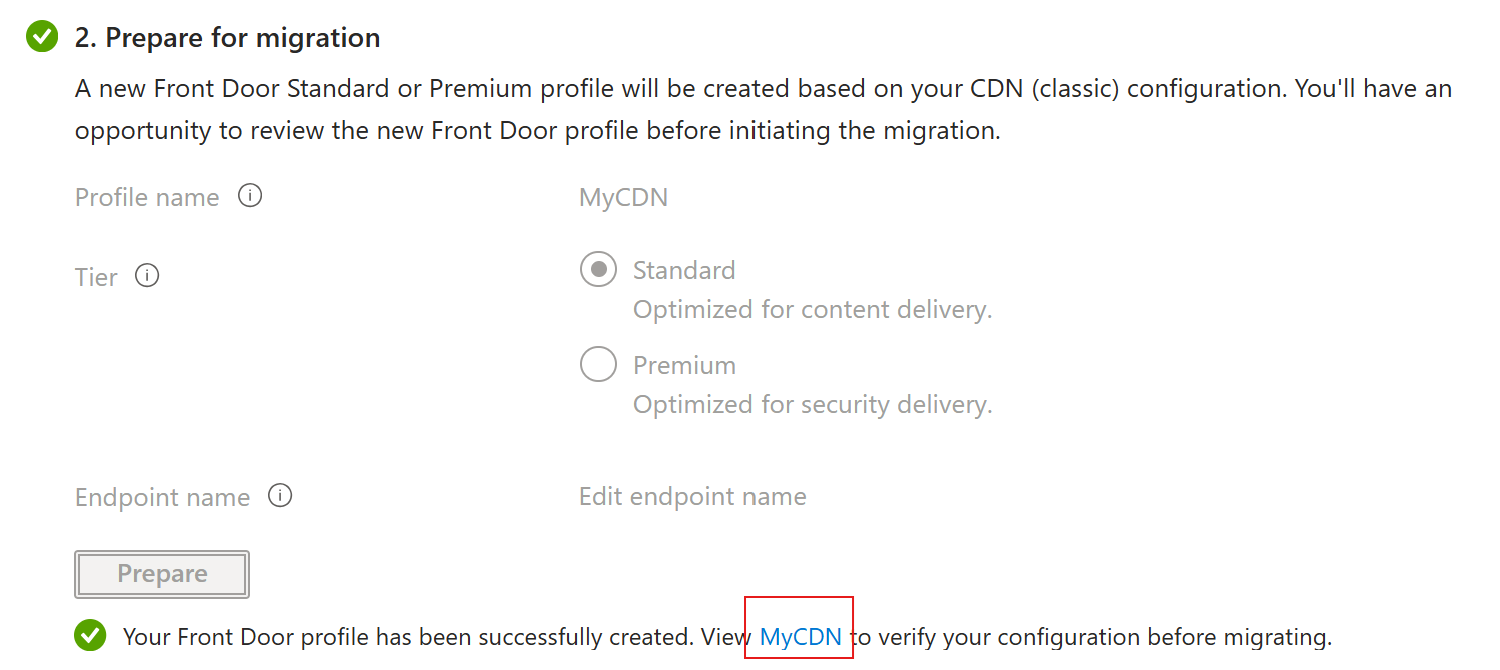
Select Prepare, and when prompted, select Yes to confirm that you want to proceed with the migration process. After you confirm, you can't make any further changes to the Azure CDN from Microsoft (classic) profile.
Select the link that appears to view the configuration of the new Front Door profile. At this time, you can review each of the settings for the new profile to ensure all settings are correct. When you finish reviewing the read-only profile, select the X in the top right corner of the page to return to the migration screen.
Enable managed identities
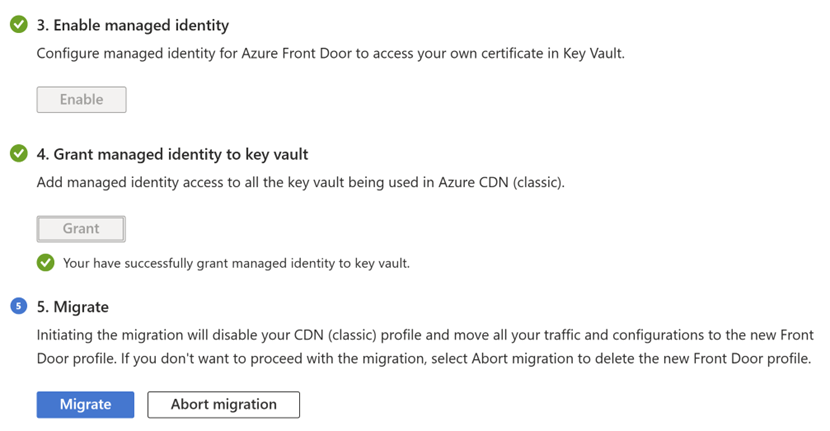
If you use your own certificate, you need to enable managed identity so Azure Front Door can access the certificate in your Azure Key Vault. Managed identity is a feature of Microsoft Entra ID that you use to securely connect to other Azure services without managing credentials. For more information, see What are managed identities for Azure resources?
Note
- If you don't use your own certificate, you don't need to enable managed identities or grant access to the Key Vault. You can skip to the Migrate phase.
- Managed certificate isn't currently supported for Azure Front Door Standard or Premium in Azure Government Cloud. You need to use BYOC for Azure Front Door Standard or Premium in Azure Government Cloud or wait until this capability is available.
Select Enable and then select either System assigned or User assigned depending on the type of managed identities you want to use.
System assigned - Toggle the status to On and then select Save.
User assigned - To create a user assigned managed identity, see Create a user-assigned identity. If you already have a user managed identity, select the identity, and then select Add.
Select the X in the top right corner to return to the migration page. You see that you successfully enabled managed identities.
Grant manage identity to Key Vault
Select Grant to add the managed identity to all Azure Key Vaults used with the Front Door (classic) profile.
Migrate
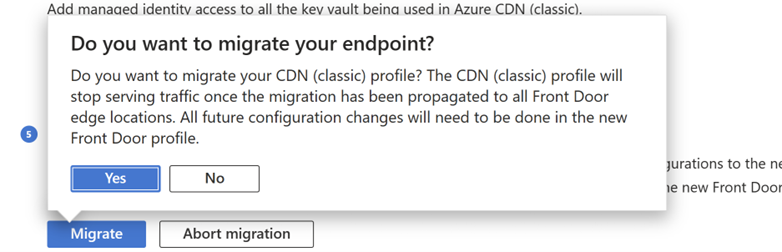
Select Migrate to start the migration process. When prompted, select Yes to confirm you want to proceed with the migration. The migration can take a few minutes depending on the complexity of your Front Door (classic) profile.
Note
If you cancel the migration, only the new Azure Front Door profile gets deleted. You need to manually delete any new WAF policy copies.
Warning
Once migration finishes, the Azure CDN from Microsoft (classic) is no longer available.
Post-migration endpoint cutover
Azure CDN from Microsoft (classic) uses a different fully qualified domain name (FQDN) than Azure Front Door Standard or Premium. For example, a classic endpoint might be contoso.azurefd.net, while a Standard or Premium endpoint might be contoso-mdjf2jfgjf82mnzx.z01.azurefd.net. For more information, see Endpoints in Azure Front Door.
Even though Azure Front Door automatically routes traffic from the classic endpoint to your new Standard or Premium profile without any configuration changes, you must complete the following post-migration action(s) depending on your scenario:
Custom domains: Update the DNS record to point to the new Azure Front Door Standard/Premium endpoint.
Direct use of the classic default endpoint: Replace the classic hostname with the new endpoint hostname in your applications, clients, and integrations.
Both endpoints remain functional during the transition, so you can make and validate this change without downtime.
Warning
Complete the endpoint cutover to the new Azure Front Door Standard/Premium endpoint by March 31, 2028. Starting April 1, 2028, classic endpoints are no longer supported and might stop functioning. Custom domains, applications, or clients that still depend on a classic endpoint might stop receiving traffic.