Note
Access to this page requires authorization. You can try signing in or changing directories.
Access to this page requires authorization. You can try changing directories.
In this quickstart, you create and activate an Azure Key Vault Managed HSM (Hardware Security Module) by using the Azure portal. Managed HSM is a fully managed, highly available, single-tenant, standards-compliant cloud service that enables you to safeguard cryptographic keys for your cloud applications, using FIPS 140-3 Level 3 validated HSMs. For more information on Managed HSM, review the Overview.
Prerequisites
An Azure subscription is required. If you don't have one, create a free account before you begin.
Create a Managed HSM
Creating a Managed HSM is a two-step process:
- Provision a Managed HSM resource.
- Activate your Managed HSM by downloading an artifact called the security domain.
Provision a Managed HSM
Sign in to the Azure portal.
In the search box, enter Managed HSM and select Managed HSM Pools from the results.
Select Create.
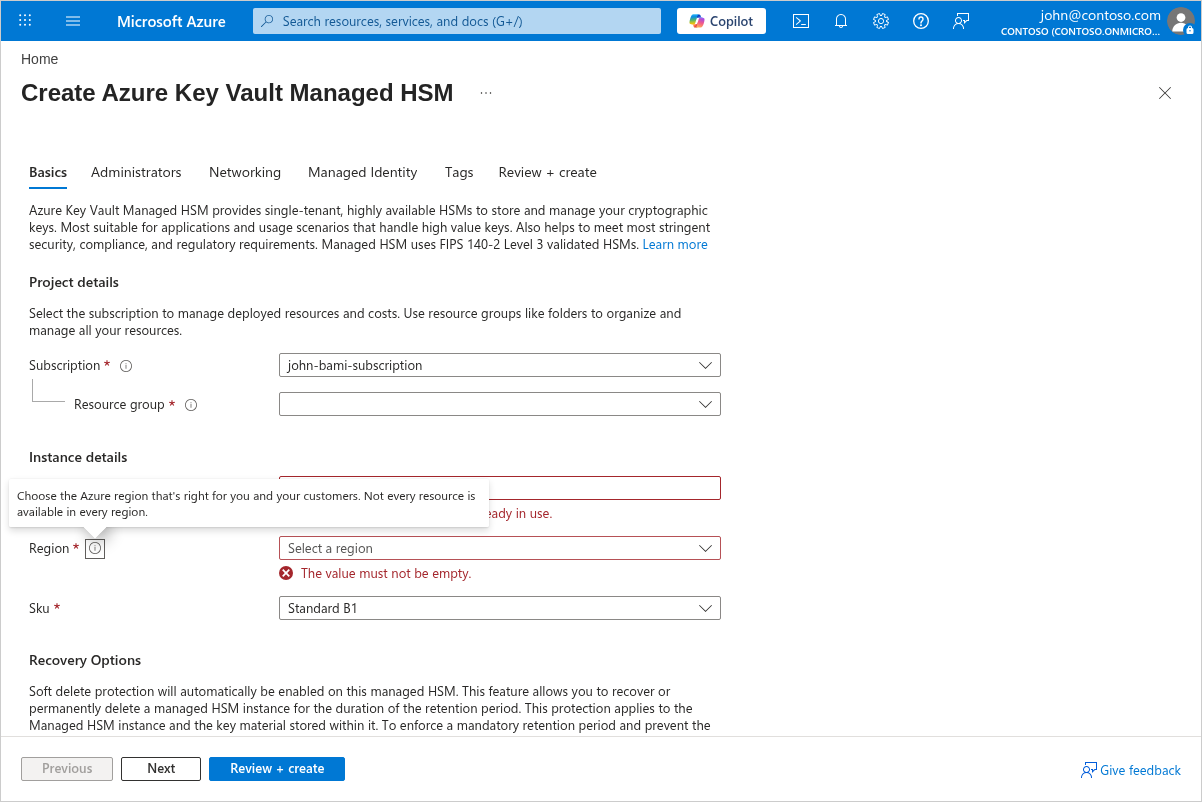
On the Basics tab, provide the following information:
Subscription: Select the subscription you want to use.
Resource group: Select Create new and enter myResourceGroup.
Managed HSM name: Enter a name for your Managed HSM.
Important
Each Managed HSM must have a unique name.
Region: Select East US (or your preferred region).
Initial administrator(s): Search for and select the Microsoft Entra users or groups to designate as initial administrators.
Adjust settings on the Advanced, Networking, and Tags tabs as needed.
Select Review + create, then select Create.
The deployment takes a few minutes to complete. When it's finished, navigate to the resource to see its Overview page.
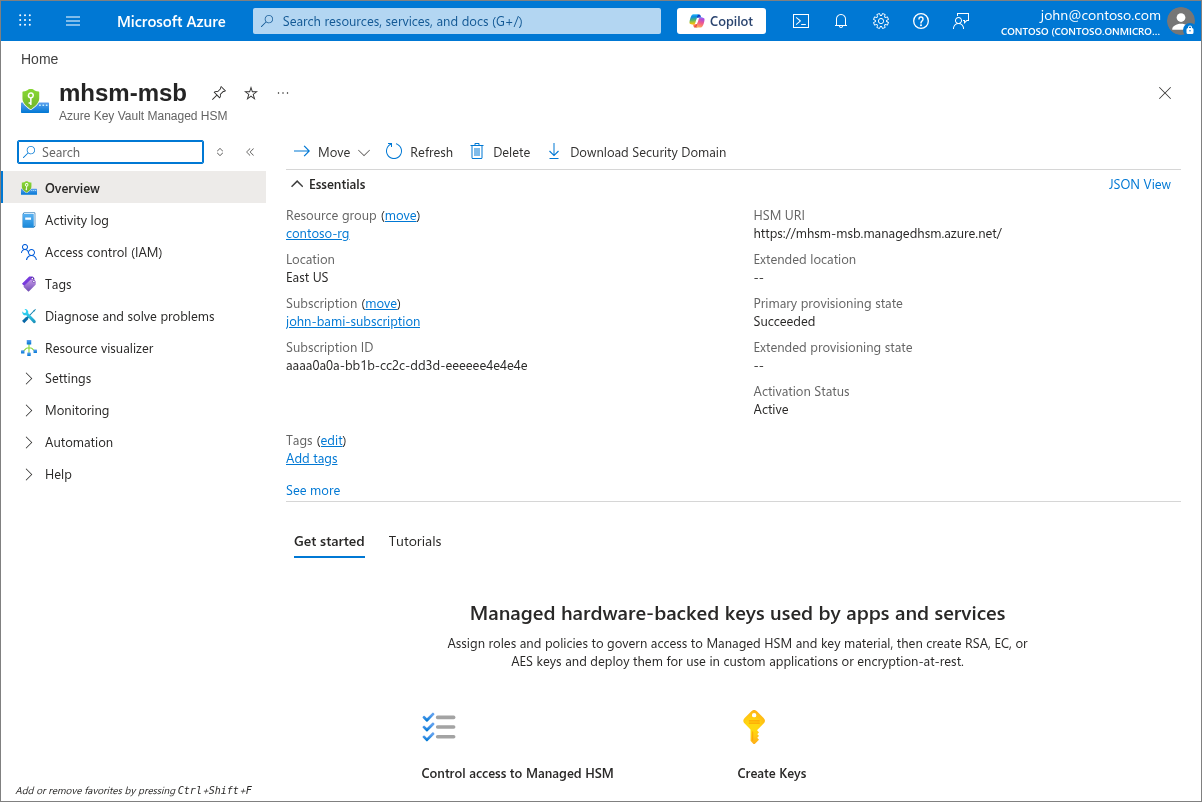
Note
The provisioning process can take a few minutes. When it completes successfully, you're ready to activate your HSM.
Warning
Managed HSM instances are always in use. If you enable purge protection by using the --enable-purge-protection flag, you pay for the entire retention period.
Activate your Managed HSM
All data plane commands are disabled until you activate the HSM. You can't create keys or assign roles. Only the designated administrators that you assign during the create command can activate the HSM. To activate the HSM, you must download the Security Domain.
To activate your HSM, you need:
- A minimum of three RSA key pairs (maximum 10)
- The minimum number of keys required to decrypt the security domain (called a quorum)
You send at least three (maximum 10) RSA public keys to the HSM. The HSM encrypts the security domain with these keys and sends it back. Once the security domain download completes successfully, your HSM is ready to use. You also need to specify the quorum, which is the minimum number of private keys required to decrypt the security domain.
The following example shows how to use openssl to generate three self-signed certificates:
openssl req -newkey rsa:2048 -nodes -keyout cert_0.key -x509 -days 365 -out cert_0.cer
openssl req -newkey rsa:2048 -nodes -keyout cert_1.key -x509 -days 365 -out cert_1.cer
openssl req -newkey rsa:2048 -nodes -keyout cert_2.key -x509 -days 365 -out cert_2.cer
The certificate expiration date doesn't affect security domain operations—even an "expired" certificate can still be used to restore the security domain.
Important
These RSA private keys are the root of trust for your Managed HSM. For production environments, generate these keys using an air-gapped system or on-premises HSM, and store them securely. See Security domain best practices for detailed guidance.
In the Azure portal, navigate to your Managed HSM resource.
In the left menu, under Settings, select Security domain.
Follow the portal prompts to upload your RSA public key certificates (minimum three) and set the quorum value.
Download the encrypted security domain file.
Important
Store the security domain file and the RSA private keys in a secure, separate location. You need them to recover the Managed HSM in a disaster recovery scenario. Loss of the security domain can result in permanent loss of access.
Store the security domain file and the RSA key pairs securely. You need them for disaster recovery or for creating another Managed HSM that shares the same security domain so the two can share keys.
After successfully downloading the security domain, your HSM is in an active state and ready for you to use.
Clean up resources
When no longer needed, you can delete the resource group, which deletes the Managed HSM and all related resources:
- In the Azure portal, search for and select Resource groups.
- Select the resource group (for example, myResourceGroup).
- Select Delete resource group.
- Enter the resource group name and select Delete.
Warning
Deleting the resource group puts the Managed HSM into a soft-deleted state. The Managed HSM continues to be billed until it's purged. See Managed HSM soft-delete and purge protection
Next steps
In this quickstart, you provisioned a Managed HSM and activated it. To learn more about Managed HSM and how to integrate it with your applications, continue on to these articles.
- Read an Overview of Managed HSM
- Learn about Managing keys in a managed HSM
- Learn about Role management for a managed HSM
- Review Secure your Azure Managed HSM deployment